Wednesday, January 25, 2012

Simplicity 2603 + Some Ruffles

I know that I am way behind the times, but I just couldn't wait to get started on my "cozy" cardigan.  Then I saw a ruffled cardigan at Belk that I just had to have... until I saw the price tag.  So I decided to take Simplicity 2603 and modify it to make my own Belk cardigan.


I used the back piece and sleeves exactly from the pattern, but took the front pieces and cut them down significantly, so they met in the front without any drape.  Then I cut a long piece of material 4 inches wide and 3x as long as the front of the cardigan (from the bottom on one side, around behind my neck and down to the bottom on the other side). 

For the actual assembly, I followed the pattern directions exactly.  It was extremely easy to put together and I love the way the sleeve ends finish with a cuff.  Then I finished the raw edges in the front with bias tape and sewed my ruffle on top.  I made a pink one last winter in a sweater knit and just finished a lavender one in a jersey knit.  This has turned out to be one of my favorite projects!


Out with my adorable husband...

I have some aqua knit in my stash and definitely plan to make an actual cozy cardigan this winter!

Monday, January 23, 2012

Simplicity Cynthia Rowley 2587 - Take Two

After I posted the blog entry on my Cynthia Rowley 2587, I was getting ready to head over to patternreview.com and I decided that I really didn't like it - so I went home and grabbed my seam ripper.

I didn't have a lot of the red material when I first started this project, so I skimped a little on the sleeves and cut a size 6.  It's taken a few blow ups to realize... pattern sizing does not equal retail sizing.  I definitely need a size 8 in the upper body/shoulder area.

So off came the sleeves and out went the zipper.  I decided to redo the whole project and make view A, but short.  I added a little extra fabric into the side seams reworked the entire top and added the zipper back in.  Then I sewed up the middle about an inch and half.  The end result is SO much better.  It is definitely not a conservative, church going dress, but it is so much more comfortable.

With my sweet helpers... could they be any cuter?

I'm so glad that I made these changes... there is nothing worse than spending the time to make something and then just letting it hang in your closet unworn.  I do think that I will make the long sleeved version in a soft, light cotton this summer as a beach cover up...  I just need a little warm weather!

Wednesday, January 18, 2012

Springtime Ruffles in January

Made by Rae is one of my favorite craft blogs.  Rae is amazing about sharing free tutorials and patterns.  I made her Buttercup Bag as a clutch for my sister a few months ago and was excited to find her "Spring Ruffle Top." 

The instructions are easy to follow and I finished my first shirt in an afternoon.  I definitely plan to make it again with better quality fabric this spring. 

I used an inexpensive cotton to make this shirt as a trial run:


And ended up rocking it out in Mexico:


This purple material was an interesting choice... I bought a ton of it at Hancock and looking back, I'm not sure what I was thinking...  but I'm always looking for purple and orange items for Clemson games so here's what we ended up with:


This weekend I had a ton of fun at the Hancock MLK sale.  I was able to get 5 Lisette patterns for $5, so I have lots of upcoming projects...  I also got an Amy Butler hat pattern online that I am SO excited about.  One of my 2012 goals is to not buy any new clothes - major inspiration to finish up some sewing projects!

My New Brother

For Christmas this year I finally upgraded to a new machine - the Brother SE 400!  My old one was dependable and perfectly functional, but I wanted one that had an embroidery function and decorative stitches!  This model seemed to offer everything that I wanted and the price was right!  Well in the last couple weeks I haven't been disappointed.  He is so quiet and so much easier to work with than "little brother" (my old machine). 

For my first attempt and monogramming, I personalized a duffle bag and binder from Pottery Barn Kids that I bought for my niece.  I used the instructional DVD to help me figure out the basics, but once I got started, I couldn't believe how easy the whole process was.


I'm completely obsessed... not one dish towel in my house has been spared!

Wednesday, January 11, 2012

Christmas Quilt Mania

Every year the "Creative Crafters" in my neighborhood made fleece blankets, scarves and quilts for local nursing homes and CASA.  They meet while I'm at work, but my adorable neighbor was telling me all about their project and I thought that it sounded like the perfect excuse to start learning how to quilt.  With the help of my mom, I was able to finish two quilts!  I cheated a bit for time and just sandwiched the quilted part with fleece and then top stitched.  I was pretty pumped with the way that they came out.  I also made a blanket using a piece of gingerbread panel material that I already had and a fleece blanket with some leftover fleece.

 I didn't start the whole project until December 1, so it was a pretty busy month!

This was my first quilt.  A pretty basic pin wheel.  Mom taught me how to cut one 12"x12" square in my first material and then another 12"x12" square in a coordinating fabric and sew them together, right sides together.  Then I took my rotary cutter and cut diagonally across my block twice.  Once I opened them up and ironed them, I had a square with two triangles (one in each fabric). I put four of those squares together (carefully) and I suddenly had a pinwheel.   MAGIC! 

I have to confess- I love this quilt.  The colors are beautiful and it was my first quilt... so I kept it...


Onto quilt # 2.  We figure that a lot of people would make more feminine quilts (like my pinwheel), so I wanted to make sure that one of mine would be appropriate for a man.  I chose the "square within a square" pattern and used plaid material and dark green material.  I backed it with blue fleece and then top stitched around the outside of the small plaid squares.  The finished product reminded me a lot of LL Bean.  Keeping the holiday spirit in mind, I was actually able to part with this one!

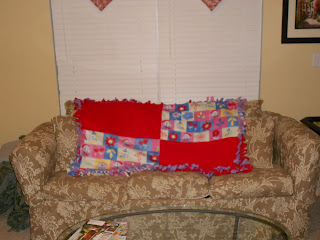
I've been on a mission to use up a lot of the material that I have.  So, for the last two, I dug into my bins and found a gingerbread panel and a chunk of children's fleece and quickly put the following 2 blankets together.


Lucy- My little Christmas helper sleeping on the job!


Tuesday, January 10, 2012

Cynthia Rowley 2587

A new year and a new committment to my crafty blog!  Happy 2012! 

I love Cynthia Rowley patterns and 2587 looked so pretty on the model, so I was so excited to get started.


I bought a nice quality red, patterned cotton a few months ago and was saving it for the perfect project.  I thought this one was it... The dress was quite easy to make.  The reviews on Pattern Review definitely indicated that it was low cut, but  I thought everyone was being too conservative... WRONG!  I suspect that I cut a size too small because not only is it extremely low cut, but also seems to create cleavage that I never knew I had.  The sleeves are also a bit tight.  I wore it the other day with a tank underneath it and it's definitely not one of my favorites...